Maintaining a book of business can be challenging. Customer success teams often find themselves navigating rocky waters as the customer's experience has both crests and troughs throughout their journey. As your teams talk with customers they begin to decode where exactly on this journey the customer may be and what their overall sentiment is like, with the penultimate goal being to help customers maximize the crests and minimize the troughs.
One great way to do this is to send customers gifts of appreciation or support when the time is right. For example, you could send a customer a Welcome Box to thank them for signing up and becoming part of your loyal customer base. Perhaps you may even want to send them a holiday gift, a gift at the time of their renewal, or better yet, a gift to celebrate their milestones (i.e - First X number of email sends, their tool going live, etc.).
It doesn’t have to just be about their company’s relationship either. It may be specific to your primary point of contact such as a wedding gift if they’re about to get married, or a Starbucks gift card if they are having a tough week.
At Gainsight we currently use a third party to help us with this called Sendoso. Sendoso is a great tool that allows you to keep track of the gifts you send, allocate budgets to teams, and much more. We’re also big fans of automation and creating a digital-first experience for our customers. That’s why we leverage both Journey Orchestrator and Sendoso to be able to send gifts to our customers throughout their customer journey.
This has empowered our customer success teams to provide a great experience at the right time for our customers, leveraging the power of gift sends. The automation has been set up so it can be leveraged in a few different ways, such as sending a gift based on the number of days since a customer has signed up, a milestone is achieved, or even if the CSM logs a timeline entry with the selection of the correct options.
We’re super excited about having completed this project and so wanted to share with you how best to replicate this if you also happen to use a service similar to Sendoso.
Getting Started
| Note: In order to leverage this integration it will require some knowledge of APIs and access to Gainsight CS as an administrator. If you are ever unsure, please make sure you contact a developer for assistance. |
For this guide, we are going to provide a step-by-step breakdown of how you can leverage Custom Connectors with third-party APIs, External Actions, and Journey Orchestrator. There are however many other ways to achieve similar results by leveraging the Rules Engine to perform a specific action once a milestone, CTA, or Timeline entry has been recorded on the Company/Relationship level.
Sendoso API Access
Thankfully the team at Sendoso has done a great job of providing clear and concise API documentation for all of their customers to use. You will however need to request a Client ID and Client Secret from your contact at Sendoso.
Sendoso Touches
Before you begin, you will need to have a “touch” created within Sendoso. This is your selection of what gift you wish to be sent to your end customer. Once you have this created, please save the Touch ID for use later in the process.
Creating the Custom Connector
Once you have the Sendoso API credentials and you are ready to go, it’s time to begin creating the connector. To achieve this you will need to do the following:
-
On the left-hand side of Gainsight, select Administration followed by Integrations and Connectors 2.0

-
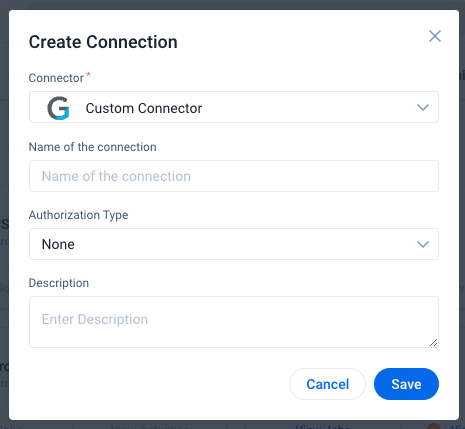
The next step is to create a Connection. Press the Create Connection button at the top right and select Custom Connector
-
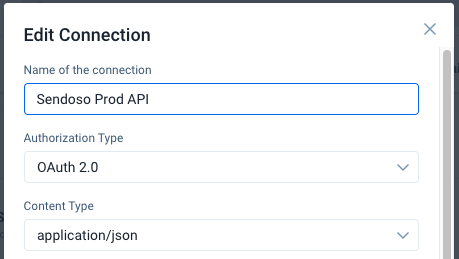
Provide a name for the connection and select the Authorization Type as OAuth 2.0. You will then need to adjust the Content Type to Application/JSON
-
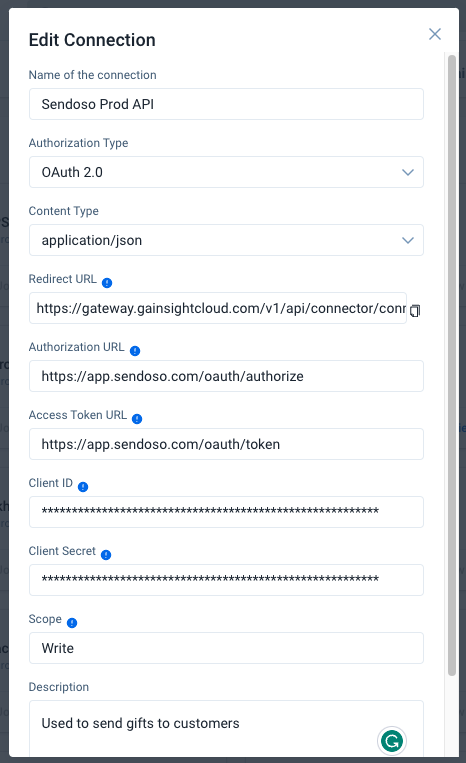
As you scroll down this dialogue box, you will also need to provide the specific API details. These details are subject to change so please make sure you double-check the Sendoso API to confirm. At the time of writing this article, the details are as follows:
Authorization URL: https://app.sendoso.com/oauth/authorize
Access Token URL: https://app.sendoso.com/oauth/token
Client ID: Provided by Sendoso team
Client Secret: Provided by Sendoso team
Scope: Write
-
Once completed, press Authorize
Creating the External Actions
For every different way you wish to interact with Sendoso’s API, you will need to create the relevant external action. For example, if you wish to send an E–Gift you need to corresponding external action. For this post, we will only create one external action, and use it for sending a gift during the Onboarding process.
-
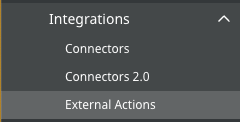
On the left–hand side within Gainsight, select the Administration tab, followed by Integrations and External Actions
-
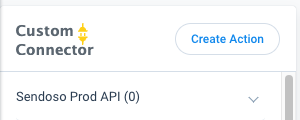
You will notice on the left-hand side the name of your custom connector and a (0) next to it, indicating it doesn’t currently have any external actions. To create one, press the Create Action button at the top
-
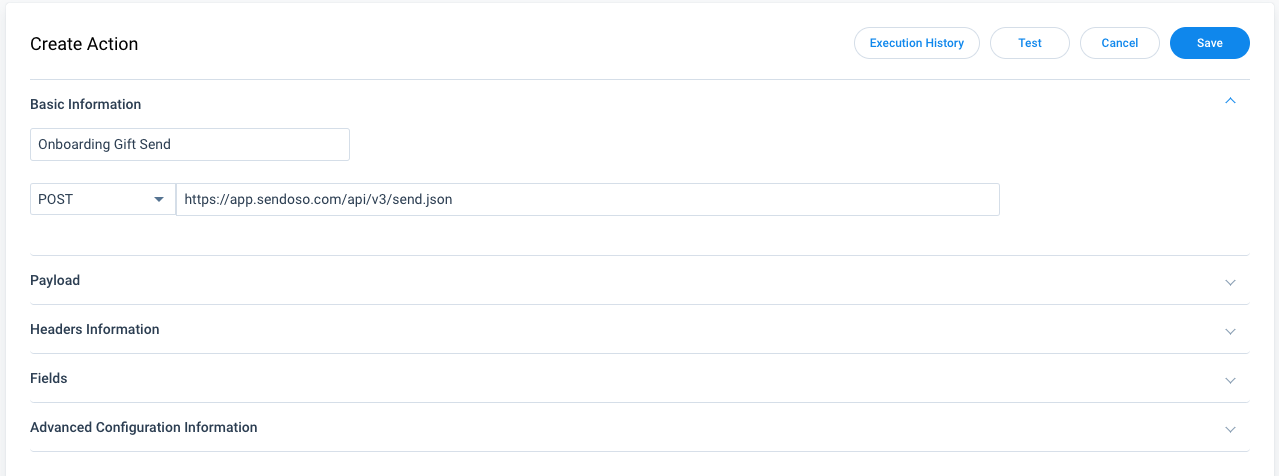
Select the relevant connector and provide an Action Name. We recommend making it as clear as possible.
Before proceeding, you will also need to include a POST URL. You can find the correct URL to use for your intended action on Sendoso’s API documentation. Once completed, press Create
-
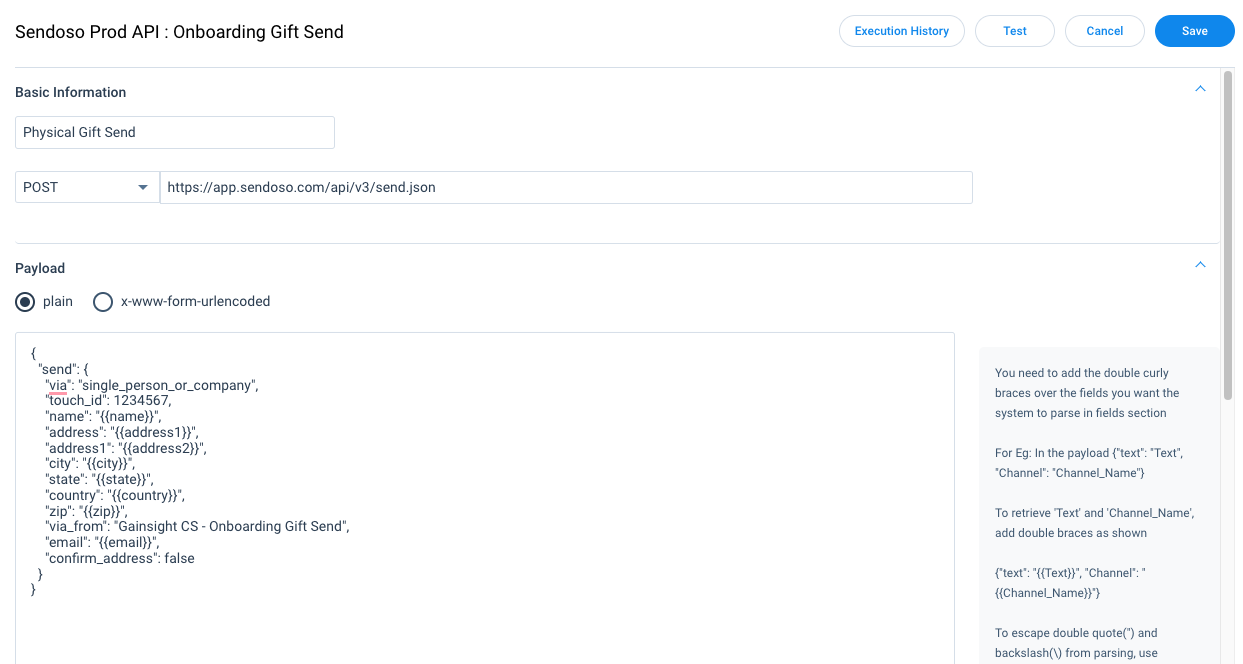
On your newly created external action, expand the Payload section, and by using Sendoso’s API documentation as a reference point, create the relevant payload you wish to parse to the API then hit Save
-
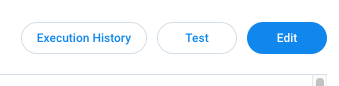
You can test the external action by pressing Test at the top right. Check Sendoso’s API documentation for any errors you receive and for the expected “success” response
Now you have the Custom Connecter and External Actions created, it is time to put them to use. At this point, if you wish to use an alternative method to initiate an external action, you can do so by leveraging the Rules Engine.
Creating the Journey
We will be using Journey Orchestrator to collect the name/address of our point of contact and send them the gift. It is important to make sure that you have good–quality data if you wish to use a similar setup.
If you are unsure that the name/address is correct, it is best to confirm this with the end user first. Sendoso offers a feature called Address Confirmation which can direct the customer to a form so they can enter their contact details. Alternatively, you can also create a Survey within Gainsight and store the updated information on the contact record.
-
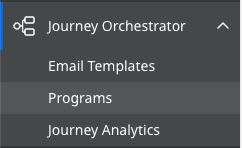
On the left-hand Navigation, select the Journey Orchestrator option, followed by Programs
-
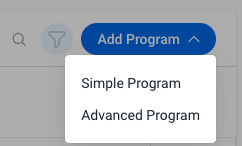
At the top right of the screen press the Add Program button followed by Advanced Program
-
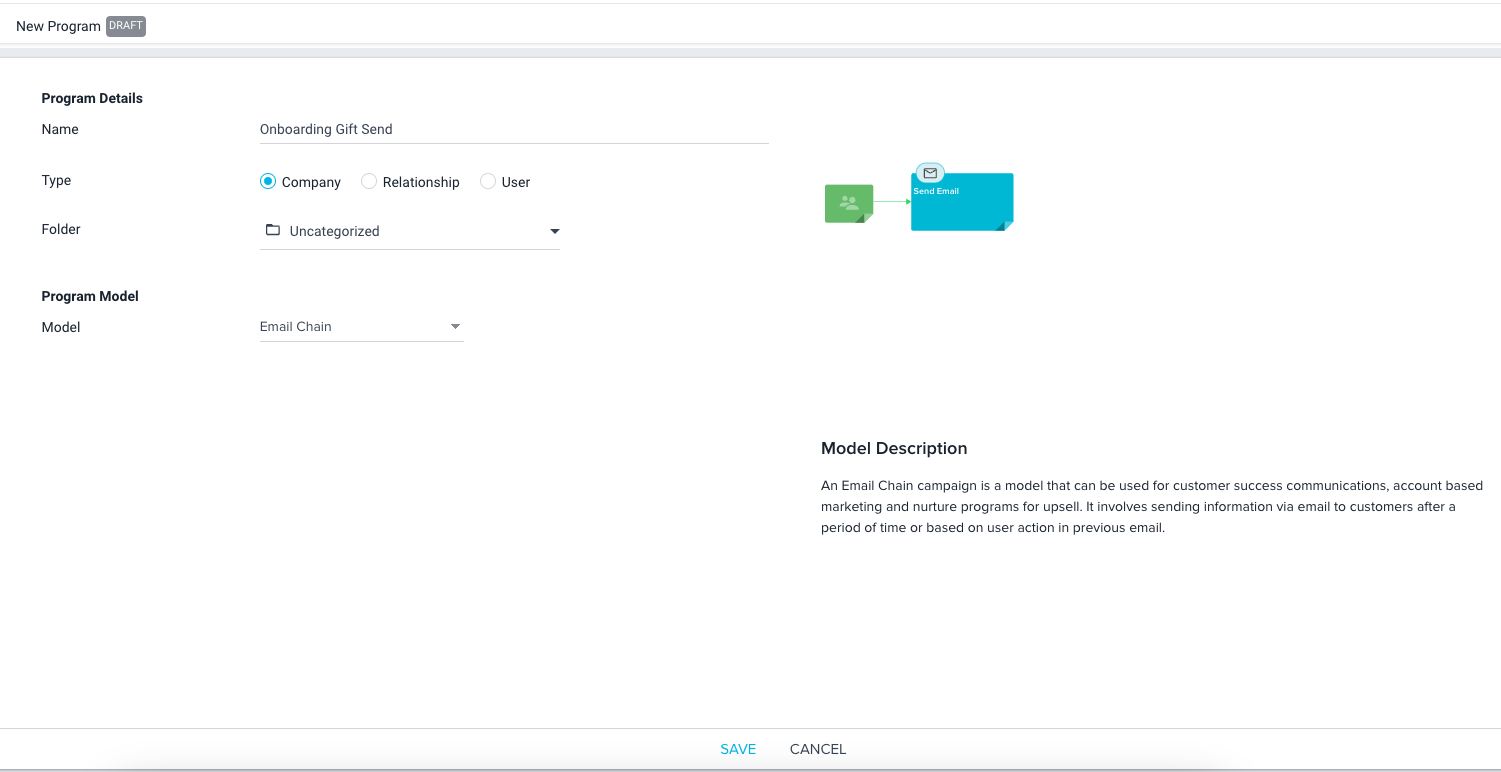
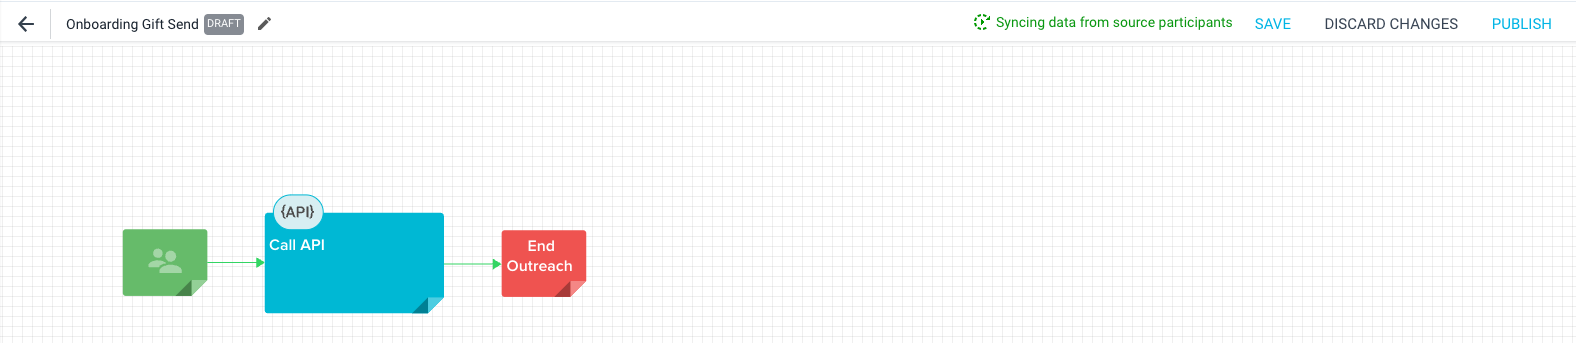
Provide a Name for this journey, and change the Model to Email Chain. Then press Save
-
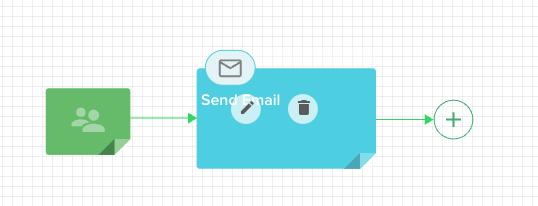
Hover over the Send Email step in the journey and press the Trash Can icon and when prompted to confirm, press Yes

-
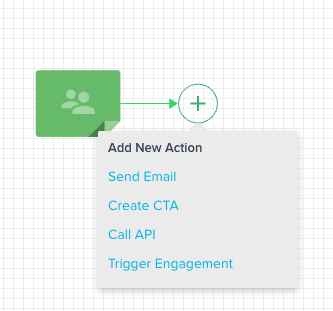
Press the Add icon to the right of your participants and press Call API
-
Once the Call API step has been added, press your Participants step and configure your participant query as needed. For more information on how to do this, check out our guide on how to Add Participants to a Program
-
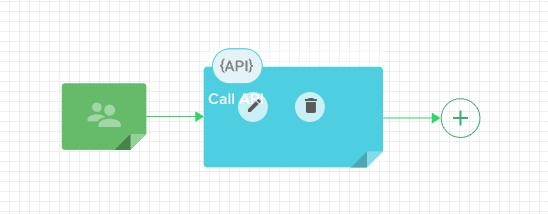
Once your participants have been configured, hover over the new Call API step and press the Pencil Icon
-
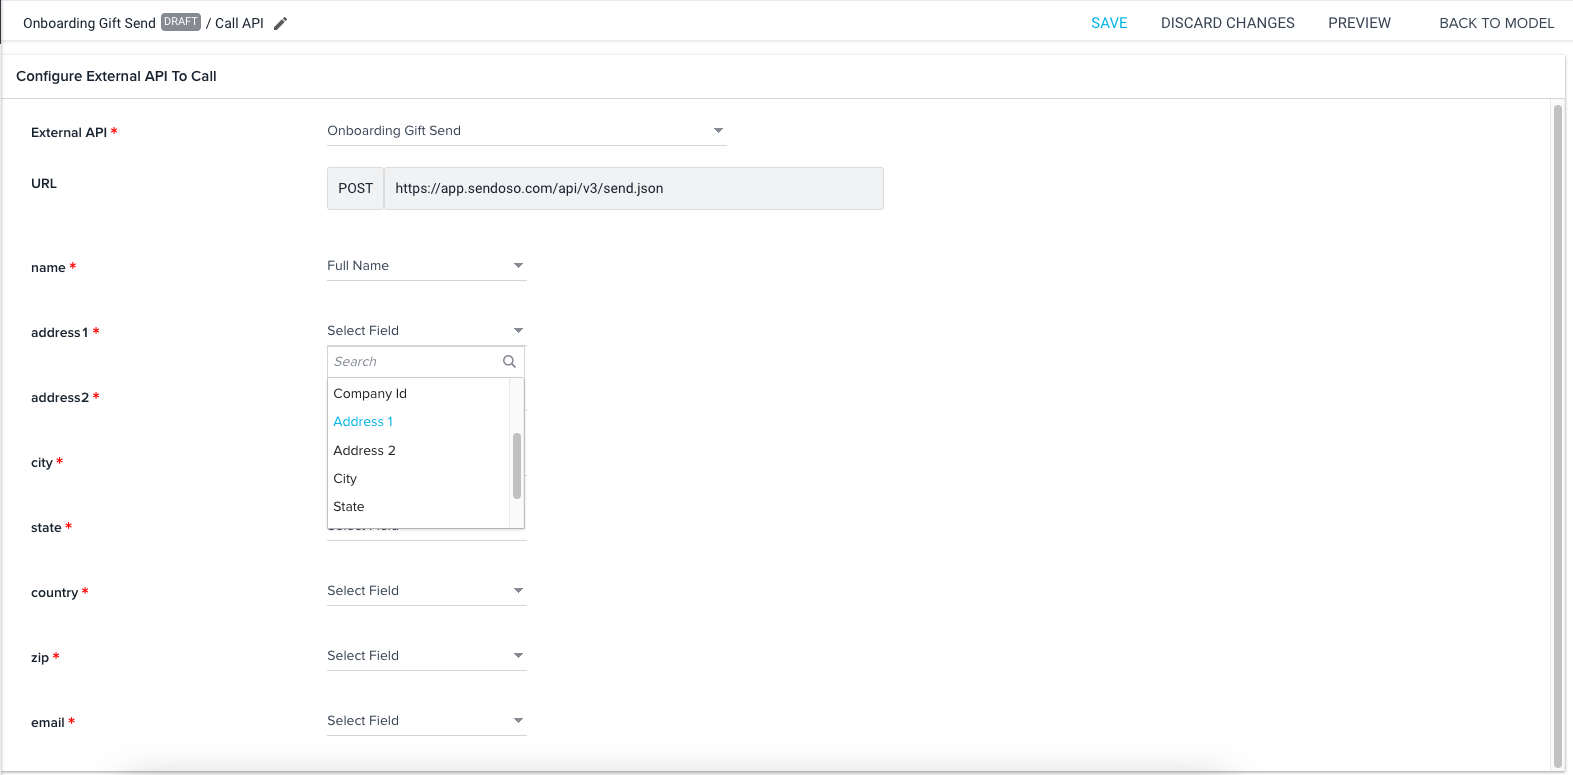
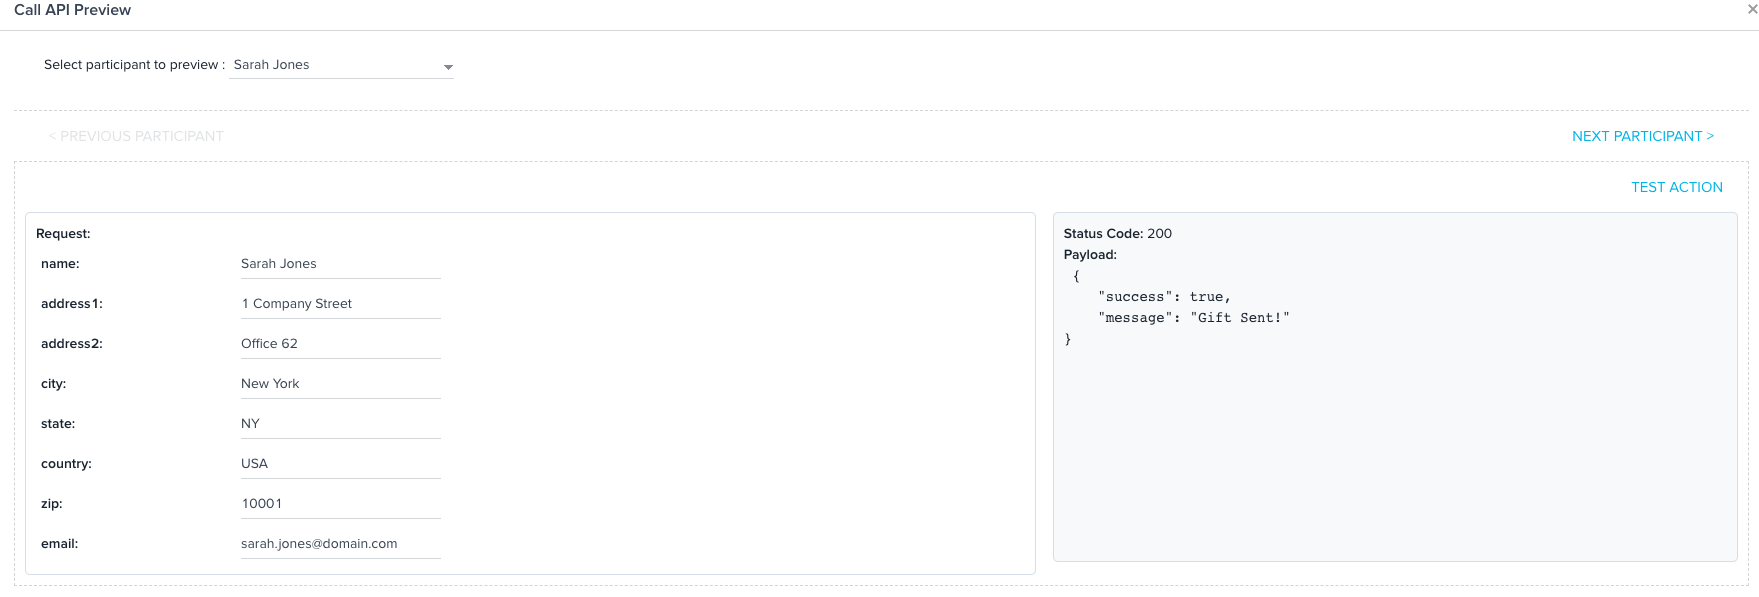
Locate the External API (also known as External Action), confirm the URL is correct, and begin the process of mapping all of the relevant fields to your participant data. Once completed, press Save. If you have participants loaded to the program, you can also Preview what the results are and the full API payload
-
Once completed, you can add any additional steps you wish for the program to make. Such as a CTA for your Customer Success team to check in two weeks later, or an email alert to your Account team about the gift having been sent. When you are ready, you can press Publish at the top right of the screen
Closing Remarks
The ability to automate API calls using Journey Orchestrator is a real game changer. It expands the possibilities for interacting with both your product/s and any third-party service which isn’t natively integrated with Gainsight.
Using this method to send gifts not only helps provide an automated way to improve your customer experience but can also help create meaningful relationships between your account teams and your end customers.
Special thanks to
About the Author
My name is Aaron Hatton and I am a Digital Program Manager at Gainsight, helping develop Digital Customer Success strategies to elevate the Gainsight experience for all our customers and products. Follow me for more useful tips and tricks like this in the future.